
March's Top Winner will receive 3 digital sentiments made by yours
truly, and each stamper who's card is showcased will receive 1 digital
sentiment made by yours truly! ;) Here's the best part--THE WINNERS get
to choose what they want their sentiment to say and what style! If
this doesn't sound like something you'd like, you could choose from some
sentiments that I already have made. :) More details will be forthcoming after winners are announced.
With all that taken care of, let's get to it! We've got another fabulous challenge for you this month at Technique Time Tuesday--it's called BRICK WALL!!! We cannot wait to see what amazing creations you create with this tutorial! PLEASE MAKE SURE THAT YOUR CREATION USES OUR TUTORIAL OR YOUR ENTRY WILL BE DELETED. If you need to review the rules, please consult the tab up top! Now let's get started!
***************************************
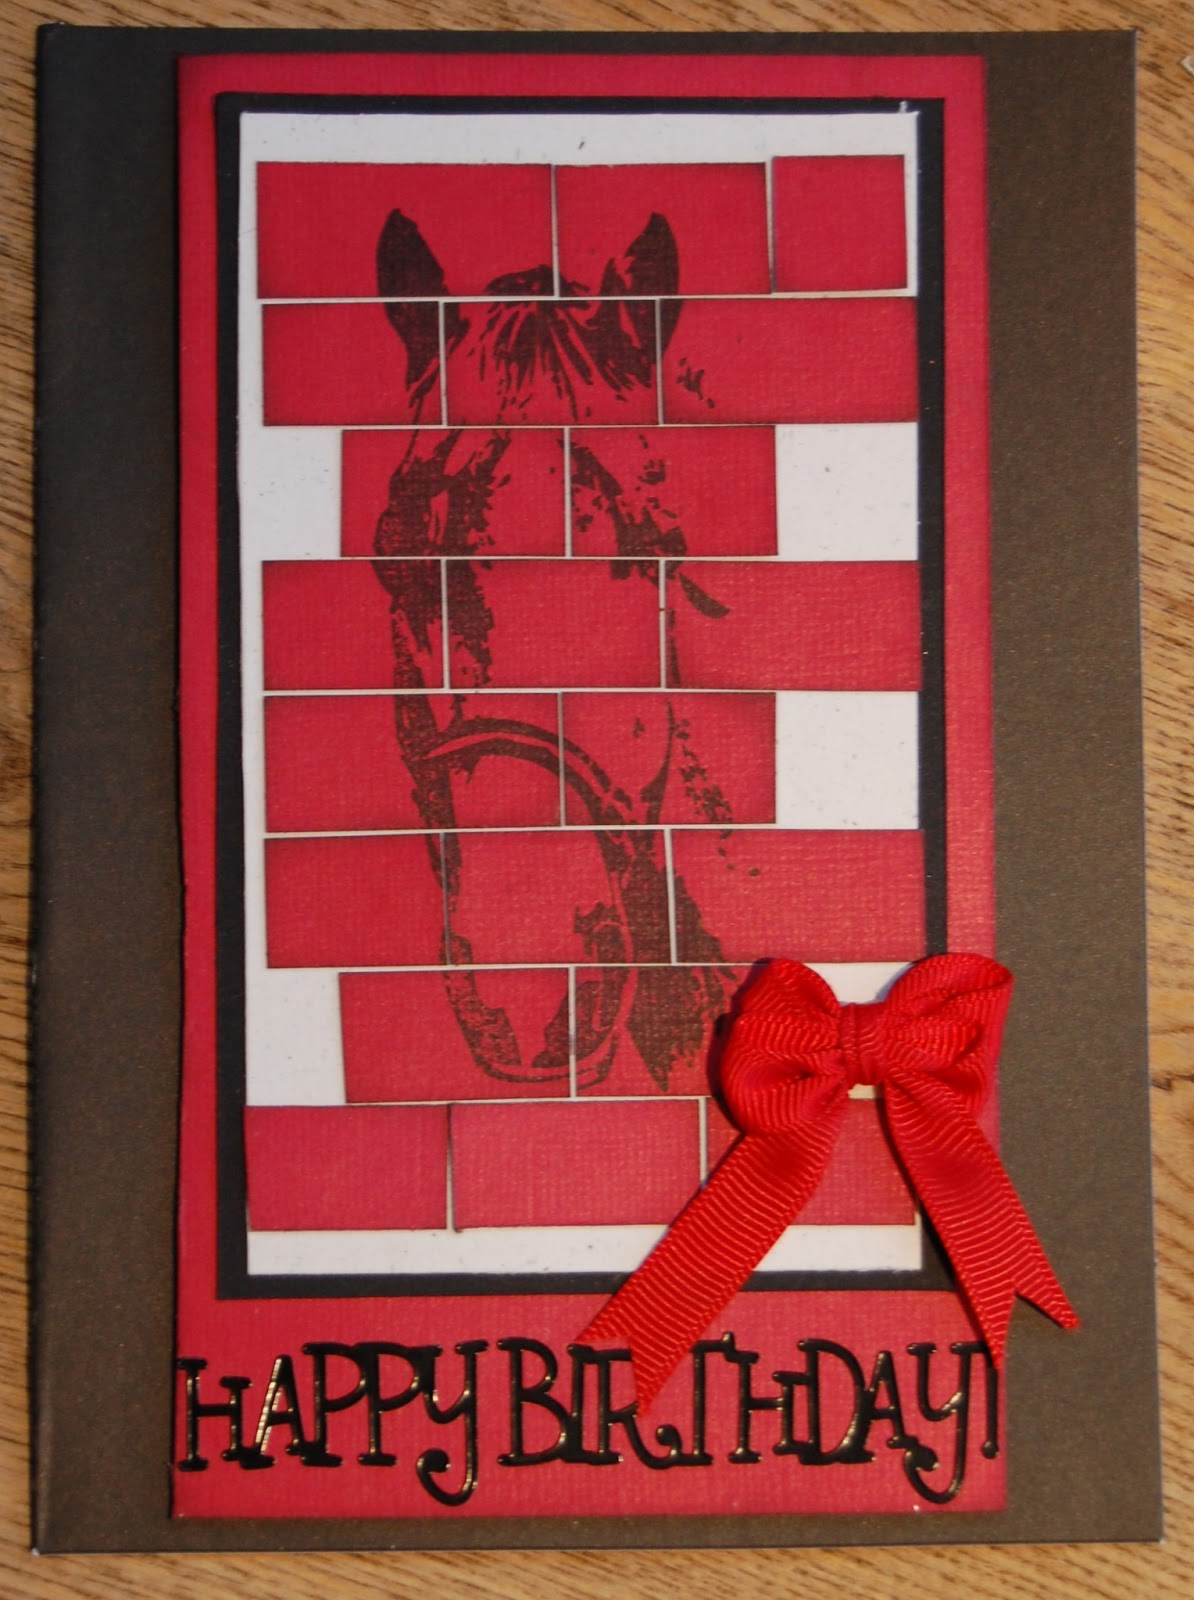
Brick Wall Technique
Materials Needed
 |
| Not all materials pictured. |
*Patterned paper (or just cardstock)
*Black ink pad
*Versamark ink pad
*Black embossing powder
*Heat gun
*Ruler
*Scissors
*Scor-tape (can use other adhesive, but this was easiest to use)
*Stamp(s) with desired image(s)
*Embellishments, etc., to finish project
***************************************
"How To"
1. Stamp you image onto your patterned paper or cardstock with the black ink.

2. Stamp the image again using Versamark ink--try to stagger it so that after you're done, it will have a shadow effect. Coat Versamarked images with black embossing powder and heat.


3. Take your ruler and draw horizontal lines every 1/4" or 1/2". I did mine every 1/4" but then it took FOREVER to cut out and I now wish I'd done 1/2". Just a tip! ;)

4. Take your ruler again and make ticks at the top of your image every 1/4" or 1/2" depending on the width you previously chose. Create a brick wall by off setting how you draw your lines. See picture for an example.


5. Cut out the horizontal lines. Be careful to keep them in order. Speaking from experience...


6. Place Score-tape to the backs of your horizontal panels. This makes it easier to adhere when you cut out the individual "bricks."

7. Cut out your "bricks" and adhere to a backing paper with small spaces in between. You could also keep them close together and sponge the edges with ink to create a faux look if you wish.

8. Add it to your project. I die cut my finished panel and then sponged the edges with black ink to add some extra interest and texture.
 |
| More info on my personal blog HERE. |
***************************************
And now here's some inspiration
from our NEW crew members!!!~


************************************************************************
4 comments:
Wow - this looks complicated! Stunning cards from the DT though - Jacqueline xx
awesome projects!!
Great examples from the DT-Ladies. Thank you for the challenge and have a wonderful weekend
Hi Ladies ! I have linked my card for the challenge .It does not have stamping but has brick wall technique , I hope it qualifies .
Post a Comment